How to Add Custom Props to FiveM: 3D Model to YDR
By the end you will have a FiveM resource with your model as a .ydr, a .ytyp that registers it and a ready fxmanifest.lua, plus a short script to spawn and test it.
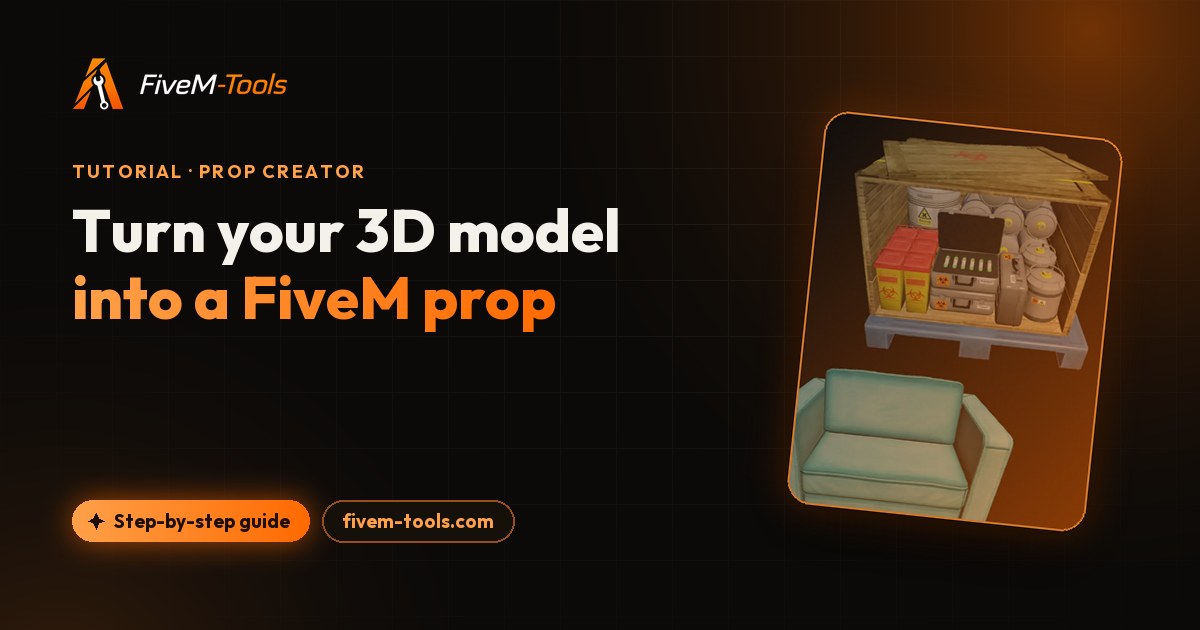
To add custom props to FiveM, you need one resource with three parts: each model as a .ydr file (with its textures inside it or in a separate .ytd), a .ytyp file that registers the models by name, and an fxmanifest.lua whose data_file 'DLC_ITYP_REQUEST' line loads that .ytyp. Add the resource to server.cfg with ensure, and you can spawn each prop by its name.
Below, you build those files from a GLB, glTF, FBX, OBJ or STL model, then install, spawn and debug the prop. You need the model, its textures and a FiveM server you can restart. The browser route adds a Discord sign-in but needs no OpenIV, CodeWalker or Blender.
What a FiveM custom prop is made of
Each file in a prop resource has one job:
| File | What it does |
|---|---|
.ydr (drawable) | The model itself: mesh and shaders, optionally with an embedded texture dictionary and collision. |
.ytd (texture dictionary) | Textures, for props that keep them outside the .ydr. |
.ytyp (archetypes) | One definition per model: its name, draw distance, bounding box and sphere, flags, and which texture and collision data it uses. |
fxmanifest.lua | The resource manifest. Its data_file 'DLC_ITYP_REQUEST' line loads the .ytyp. |
FiveM streams every file in stream automatically, but the game only knows a model through its archetype. If the .ytyp is never loaded, no archetype has your prop's name, so the model can't load and CreateObject fails. Our YTYP file explainer covers every archetype field, and the GTA V file formats guide covers the other formats.
Already have .ydr and .ytyp files?
Add-on props from a mod site or a pack usually arrive as .ydr, .ytd and .ytyp files and need no conversion. Put them in the stream folder of a new resource (extract them first if they come in a single-player dlc.rpf) and give each .ytyp its own data_file line:
fx_version 'cerulean'
game 'gta5'

this_is_a_map 'yes'

data_file 'DLC_ITYP_REQUEST' 'stream/my_props.ytyp'
Then install and test it like the resource below. No .ytyp in the pack? Make one in CodeWalker, Sollumz or GTAUtil (the Prop Creator imports 3D models, not .ydr files). Shrink large .ytd files first (see how to optimize YTD files for FiveM), and check the pack's license before you use it on a public server.
Two ways to make custom props: Blender or a browser converter
The manual route builds every file yourself:
- Clean up the model in Blender: scale in meters, the origin at the base, a sensible triangle count.
- With the Sollumz add-on, convert the mesh to a GTA drawable and give each material a GTA shader and textures.
- Build collision bounds.
- Export the .ydr, plus a .ytd if the textures stay separate.
- Create the .ytyp archetype in Sollumz or CodeWalker.
- Write
fxmanifest.luawith theDLC_ITYP_REQUESTline and test in game.
The 2017 Cfx.re forum tutorial made the .ytyp with a Node.js tool and OpenIV and used the old __resource.lua manifest. Its author marked it outdated in 2019. Current resources use fxmanifest.lua.
The Prop Creator does steps 2 to 6 for you, except the in-game test. The editor runs in your browser, and our server builds the .ydr and .ytyp from your uploads.
| Blender + Sollumz | Prop Creator | |
|---|---|---|
| Software | Blender, Sollumz, usually CodeWalker | A browser and a Discord account |
| Input | Anything Blender opens | GLB, glTF, FBX, OBJ, STL with PNG, JPEG or WebP textures |
| LOD meshes | You can build lower-detail versions | One detail level plus a culling distance |
| Collision | Any bounds you build | Box or None for everyone; Mesh and Custom Shapes for Supporters |
| .ytyp and manifest | You create them | Written for you |
| Cost | Free | 1 export per day free, unlimited for Supporters |
Choose Blender for LOD meshes or full control over shaders and collision, and the browser for a working prop from an existing model without learning the toolchain.
How to add custom props to FiveM with the Prop Creator
Step 1 applies to either route.
Step 1: Prepare the 3D model and textures
- Formats.
.glb,.gltf(with its.binand images),.obj(with its.mtl),.fbxor.stl, up to 100 MB per file. Embedded GLB and FBX textures are extracted. STL has no materials, so it gets a plain gray one. - Texture files. PNG, JPEG or WebP. A
.tgapreviews but is not saved, and other image types are rejected, so convert them to PNG. - Scale. GTA works in meters. A model whose largest side is over 100 units is treated as millimeters and divided by 1,000; one under 0.05 units is multiplied by 100.
- Origin. The model's origin becomes the prop's pivot: the point placed at the coordinates you spawn it at. Put it at the base of anything that stands on the floor, or fix it in step 2.
- Triangles. The budget is 150,000 per prop. Above it the editor warns you, shows a High poly badge and caps the detail, and the server simplifies the mesh at export. If you see artifacts, reduce the model in Blender first.
Use power-of-two texture sizes (512, 1024, 2048 px). At export, each side is rounded down to a power of two and stretched to fit (1500 × 1000 becomes 1024 × 512), then capped at 1024 px on a free account or 2048 px for Supporters.
Textures are compressed to DXT1 when fully opaque, or to DXT5 when any pixel has alpha below 250, always with a full mipmap chain. This is what one texture costs, mipmaps included:
| Texture size | DXT1 (opaque) | DXT5 (with alpha) |
|---|---|---|
| 512 × 512 | 0.17 MB | 0.33 MB |
| 1024 × 1024 | 0.67 MB | 1.33 MB |
| 2048 × 2048 | 2.67 MB | 5.33 MB |
One prop can embed up to 60 MB of compressed textures (about 11 full 2048 px DXT5 maps, or 45 at 1024 px), because its textures must fit in a single game memory page. Past that, the export stops with an error. A texture used by several props is stored in each of their .ydr files.
Step 2: Import the model and check its size
Open the Prop Creator and sign in with Discord. Create a project: its name becomes the resource name, lowercased with spaces and symbols turned into dashes, so Casino props becomes casino-props. It must start with a letter.
Drop the model and its textures on Add prop; textures are matched by file name. The editor suggests a spawn name from the file name (Casino Chair.glb becomes casino_chair), and you can edit it in the prop list.
Compare the size with the Player, Sofa and SultanRS reference models (the game's own mp_m_freemode_01, apa_mp_h_stn_sofacorn_07 and sultanrs), which are never exported. Only one of the two transform panels changes the export:
- Editor View (Editor Only) only moves the prop in the viewport.
- Prop Transform (In Game) sets position, rotation and scale (0.01 to 100 per axis), all baked into the export. Set Origin… → Model Bottom puts the pivot at the base; Model Center suits objects that should turn around their middle. If a model arrives lying on its side, rotate it 90° on X here.
Import a GLB, glTF, FBX, OBJ or STL model, set its collision and culling distance, and download a ready-to-ensure prop resource.
Step 3: Pick a shader preset for each material
Under Materials, each material gets a GTA shader preset: Default, Alpha, Cutout (alpha-test), Emissive, Normal, Normal Cutout, Normal + Spec, Normal + Spec Alpha, Normal + Spec Cutout or Decal. The editor picks one from the source file (a glTF alpha mask becomes Cutout, alpha blending becomes Alpha, normal or specular maps select a Normal variant). Each material has diffuse, bump (normal map) and spec slots and a color tint.
- Use Cutout for leaves, fences and other hard-edged cut-outs, which cast shadows, and Alpha for glass, which blends smoothly but casts no shadow.
- Presets step down when a map is missing: Normal + Spec Alpha with a normal map but no spec map exports as the opaque Normal preset, so use Alpha instead.
- A material without a diffuse texture exports as a flat color.
- GTA does not draw the back of a face. If any source material is marked double-sided, as glTF materials can be, the whole prop is drawn double-sided; the editor has no switch for it.
Step 4: Choose the collision
The Collisions section decides what players, vehicles and bullets hit. The collision is embedded in the prop's .ydr.
| Collision | What you get | Available to |
|---|---|---|
| None | No collision: players and cars pass through. | Everyone |
| Box (default) | One box around the whole prop, oriented to match if you rotated or stretched it in Prop Transform. | Everyone |
| Mesh | The visual mesh simplified for physics: up to 60,000 triangles (8,000 on a dynamic prop), under the game's limit of 32,767 vertices per collision bound. | Supporters |
| Custom Shapes | Hand-placed boxes, spheres, cylinders and capsules, or Auto-fitted shapes, merged into one mesh collision on export. | Supporters |
A box also makes the space under a table or inside an arch solid, so use Mesh or Custom Shapes for shapes like that. The other controls:
- Surface Material (23 choices, Concrete by default) sets bullet decals, impact sounds and particle effects.
- Dynamic prop (physics object) makes it a physics object. Mesh-based collision is then written in a form built for moving objects, since the static form would let the prop fall through the map.
- Collision detail (Mesh only) sets how far the collision is simplified, and Collision inflate moves its surface out or in by up to 5 mm. A green overlay previews the result.
Mesh collision and Custom Shapes need a Supporter plan ($15/month), which also allows 2048 px textures and 50 props per resource instead of 5.
Step 5: Set culling distance and mesh detail
The Optimizations section controls what the prop costs and when it shows:
- Culling distance (10 to 9,998 m, default 500) is written to the archetype's
lodDist. The export has one detail level and no lower-detail LOD meshes, so past this distance the prop is not drawn at all. Keep it modest for small clutter and raise it for landmarks that must be seen from afar. - HD texture distance (1 to 500 m, default 15) fills the archetype's
hdTextureDistfield. - Mesh detail (1 to 100%) reduces the triangle count with a live preview. At 100% you get the original mesh, except that models over the 150,000-triangle budget stay capped.
Step 6: Name the props and export
Spawn names must be 3 to 63 characters: a lowercase letter first, then lowercase letters, digits or underscores, unique within the export. The same string becomes the .ydr file name, the archetype name and the model name your scripts hash. Avoid the names of the game's own props: check yours against the GTA 5 prop list.
To add many models at once, Supporters can drop a whole folder into Bulk Import.
Click Export. The Export resource pack window lists each prop with its materials, collision and culling distance, and flags problems such as a duplicate spawn name. Confirm, and casino-props.zip downloads, with any automatic simplification noted under the link.
Free accounts get one export per tool per day, reset at midnight UTC. A failed export doesn't count, downloading the last export again is free, and a new export replaces the previous zip.
What's in the exported resource
For a project named Casino props with two props, the zip contains:
casino-props/
  fxmanifest.lua
  cleanup.lua
  README.txt
  stream/
    casino_chair.ydr
    casino_table.ydr
    casino-props.ytyp
Each .ydr holds one prop's mesh, shaders, textures and collision, and the single .ytyp holds one archetype per prop. There is no separate .ytd or .ybn, no .ymap and no spawn command. Our Garry's Mod Props pack (in beta) was built with the same exporter and has the same layout. This is the manifest the export writes:
fx_version 'cerulean'
game 'gta5'

author 'TeK - FiveM-Tools.com'
description 'Custom props - casino-props (generated by fivem-tools.com)'

this_is_a_map 'yes'

data_file 'DLC_ITYP_REQUEST' 'stream/casino-props.ytyp'

client_script 'cleanup.lua'

-- props: casino_chair, casino_table
fx_version 'cerulean'andgame 'gta5'are the standard header of a current FiveM resource.this_is_a_map 'yes'marks the resource as a GTA map and makes FiveM reload the map storage when the resource loads.data_file 'DLC_ITYP_REQUEST'loads the .ytyp and registers your archetypes. If you rename the .ytyp, change this path to match.client_script 'cleanup.lua'runs a small script on each player's game.
cleanup.lua lists your spawn names. When the resource stops, it deletes every object that uses one of those models and releases the models, so a restart leaves no orphaned objects in the world. README.txt repeats the install steps, lists the spawn names and gives a one-line spawn example. Our fxmanifest.lua guide covers the manifest format in depth.
Install and spawn the prop on your server
- Unzip the download and copy the
casino-propsfolder into your server'sresourcesfolder. - Add
ensure casino-propstoserver.cfg. - Restart the server, or type
refreshand thenensure casino-propsin the server console. - Join the server and spawn a prop by its spawn name.
The README's one-line example calls CreateObject without loading the model first. A real client script requests the model and waits for it, as this test command does. It gives up with a hint after five seconds:
RegisterCommand('spawnprop', function(_, args)
    local name = args[1] or 'casino_chair'
    local model = GetHashKey(name)
    RequestModel(model)
    local timeout = GetGameTimer() + 5000
    while not HasModelLoaded(model) do
        if GetGameTimer() > timeout then
            print(name .. ' did not load: is the resource started and its .ytyp loaded?')
            return
        end
        Wait(0)
    end
    local pos = GetOffsetFromEntityInWorldCoords(PlayerPedId(), 0.0, 1.5, 0.0)
    local obj = CreateObject(model, pos.x, pos.y, pos.z, true, false, false)
    PlaceObjectOnGroundProperly(obj)
    SetModelAsNoLongerNeeded(model)
end, false)
Put it in a client script of a test resource and type /spawnprop casino_chair in chat. For permanent placement, use a .ymap or your framework's object placement tool.
Troubleshooting custom props
The prop won't spawn
If CreateObject does nothing or the test command gives up, the archetype isn't registered or the model never loaded. Check that the resource starts without errors in the server console, that fxmanifest.lua still has the DLC_ITYP_REQUEST line, and that its path matches the .ytyp file name. If you renamed the resource folder, update the ensure line too. Then check the spawn name: GetHashKey needs the exact name, although case does not matter because GTA lowercases names before hashing. The YTYP troubleshooting checklist covers the other causes, such as name clashes.
The prop spawned but you can't see it
- You are too far away. Past its culling distance the prop is not drawn, and no lower-detail model takes over. Raise Culling distance and export again.
- You are looking at back faces. GTA draws only the front of each face. Model thin surfaces with thickness, or mark the material double-sided in your glTF file before you import it.
The prop floats or sinks into the ground
The pivot sits wherever the origin was in your model file. Use Set Origin… → Model Bottom and export again, or call PlaceObjectOnGroundProperly after spawning, as the test command does.
Players walk through it, or bump into empty space
With Collision None there is nothing to hit. A Box fills the whole bounding box, including the space under a table; Mesh or Custom Shapes follow the real shape.
Textures look blurry or flat
Free exports cap textures at 1024 px, and sizes that aren't powers of two are stretched down. A material without a diffuse texture exports as a flat color; the export checklist warns about it.
Props vanish when the resource restarts
That is cleanup.lua doing its job. Spawn them again from your script once the resource is back.
Frequently asked questions
Do I need a .ytd file for a custom FiveM prop?
Not always. A .ydr can carry its own texture dictionary, and the Prop Creator embeds every texture in each prop's .ydr, so its exports have no separate .ytd. Props built other ways often keep their textures in a separate .ytd, which then has to be streamed as well and named in the archetype's textureDictionary field.
Can I make custom props for FiveM without Blender?
Yes. A browser converter such as the Prop Creator reads GLB, glTF, FBX, OBJ or STL files and writes the .ydr, the .ytyp and fxmanifest.lua for you. Blender is still useful for cleaning up or reducing a very heavy model before you import it.
How many props can I pack into one resource?
A Prop Creator export holds up to 5 props on a free account and up to 50 for Supporters, all registered by a single .ytyp. If you need more, export several resources and ensure each of them in server.cfg.
How do I place a custom prop on the map permanently?
Use a .ymap. In an editor such as CodeWalker, add an entity whose archetype name is the prop's spawn name, move it into place, and stream the .ymap from a resource. Keep the resource that loads the prop's .ytyp running as well, or the entity has no model to show.
Can a custom prop move or fall over?
Yes, if you make it a physics prop. Turn on Dynamic prop (physics object) before you export: it sets the dynamic flag in the .ytyp and writes collision suited to a moving object. Keep collision on, and note that a dynamic prop with Mesh collision is limited to 8,000 collision triangles.
Try the Prop Creator
Turn any 3D model into a spawnable GTA V prop. Collision, embedded textures and draw distance handled, packaged as a drop-in FiveM resource. Free every day, unlimited for Supporters.
Open the Prop Creator